Graphic Image Flooring Vinyl Flooring Installation; Applying Adhesive & Cold Weld Seams

Applying Adhesive & Cold Weld Seams
WARNING: DO NOT USE MULTI-PURPOSE OR VCT ADHESIVE ADHESIVE MUST BE PLASTICIZER MIGRATION RESISTANT
The recommended adhesive for permanent installation is Taylor Resolute. An alternative adhesive is Roberts 7350 or Henry 695. If using another adhesive it must be plasticizer migrant resistant to protect against chemical reaction between the adhesive and print.
The adhesive, floor covering, and area to receive flooring must maintain a temperature of 65º to 85º F and at a relative humidity of 30% to 60% for 72 hours before, during, and after the installation.
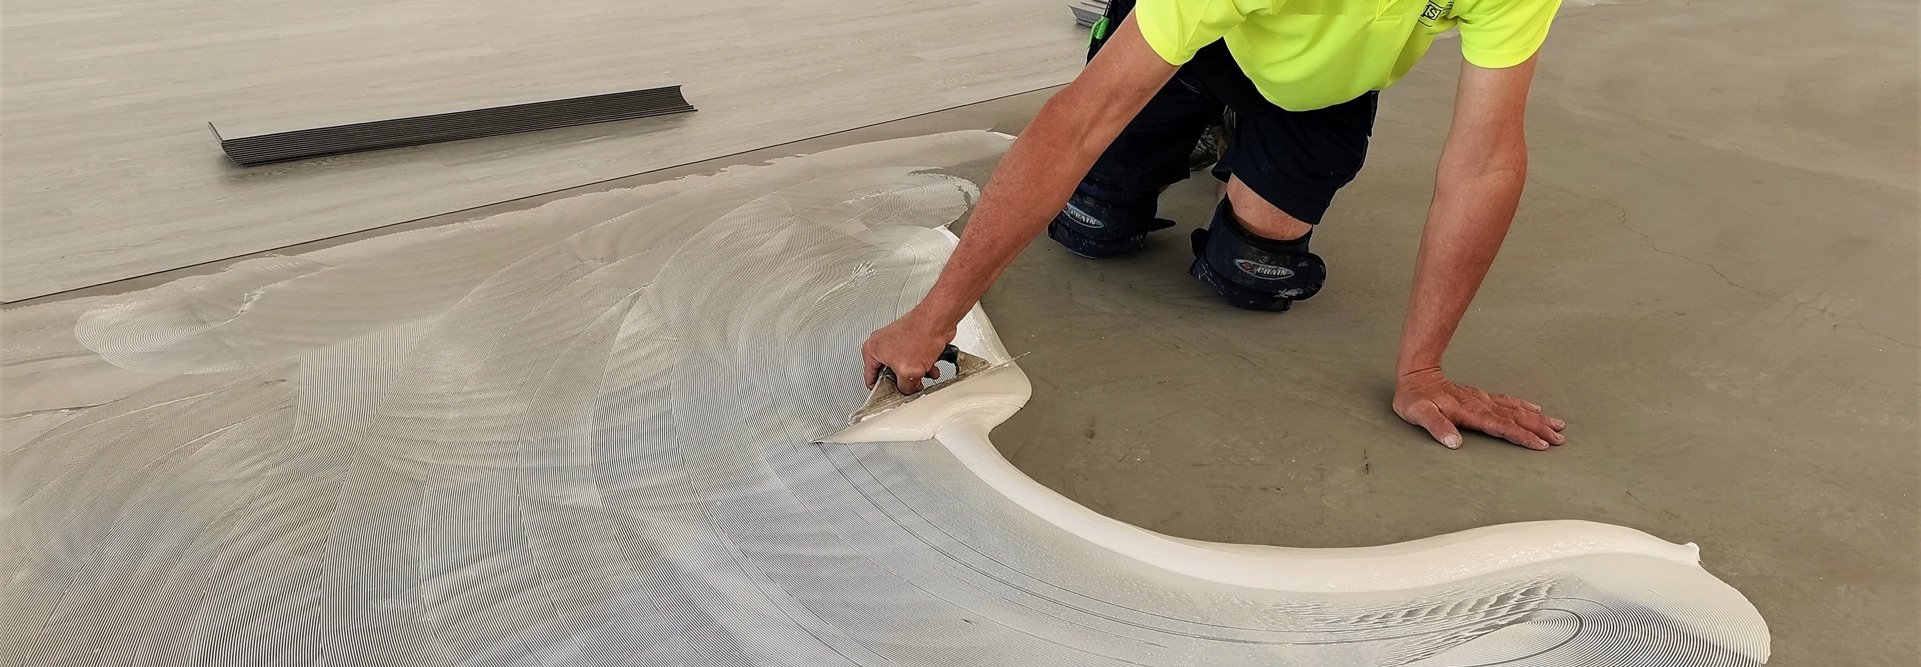
When applying adhesive, use a notched trowel, size- 1/16 in. x 1/32 in. x 1/32 in. If the notches are too large they place too much adhesive which can lead to trowel-marks showing through the material and/or excessive indentations. This can cause swelling, bubbles and buckling throughout the material. If the trowel notches are too small the adhesive will not hold the flooring down.
Spread adhesive covering 100% of the exposed subfloor, leave no gaps or puddles. Keep trowel away from vinyl backing as it may scratch the flooring and show through. Maintain uniform coverage by keeping the trowel clean and properly notched.
Taylor Resolute (MS+ Resilient)
Use Wet Set Method - The wet set method is essentially what its name infers the adhesive is troweled on the substrate, with the appropriate trowel, and lay sheet goods immediately into wet adhesive. Adhesive must wet transfer 100% to flooring product to ensure proper bond. Adhesive working time is approximately 45-50 minutes but will vary with ambient job site conditions. After installation of the flooring, roll installation with a 75-100 lb. roller.
Seams - Cold Weld
Traditional Double-cutting method using Cold Weld Liquid:
- Align the pattern and providing adequate overlap, adhere the sheets of material up to the designated dry zone.
- Cut the seam using a utility knife with a new, sharp blade. Using a steel straightedge, cut through both sheets of flooring at a 90º angle to the floor covering.
- Do not lift knife out of floor during seam cutting.
- Once you have cut the seam, remove the selvage and fold back the sheets to expose the dry zone.
- Apply adhesive with a properly notched trowel across the dry zone.
- Allow adhesive to develop tack, lay sheet that was on the bottom during the cutting process into the adhesive first.
- Place masking tape over the seam and press it down firmly.
- Cut through the masking tape over the join between the two sheets using a straight knife
- Press the needle of the tube firmly into the seam and pull the tube along the joint.
- Control the flow of liquid so that a 5 mm wide glue line appears on top of the masking tape.
- Wait about 10 minutes for the glue to bond and then pull the masking tape off.